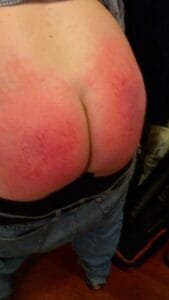
Maintenance Spankings: The Role and Importance in D/s Dynamics
Learn what maintenance spankings are, why some Dominant/submissive couples use them, and how to approach this ritual with communication, care, and consent
A Female-Led Community for the Femdom Lifestyle
A Female-Led Community for the Femdom Lifestyle
Explore the thrilling world of femdom impact play. Enhance your experience with paddles, crops, and canes, and learn the importance of safety and aftercare.
Learn what maintenance spankings are, why some Dominant/submissive couples use them, and how to approach this ritual with communication, care, and consent

Explore the intricate practice of flogging in femdom BDSM. Learn about the different types of floggers, techniques, and safety measures essential for a consensual and fulfilling experience. Discover how flogging can enhance dominance and submission dynamics, serve as erotic stimulation or punishment, and reinforce trust and intimacy between partners.

Explore the world of BDSM with our comprehensive guide to choosing your first flogger. Learn about different materials, lengths, and handle types that cater to beginners. Understand the importance of safety considerations and aftercare, as well as effective communication with your partner. This insightful article helps you navigate the beginner flogger selection process, ensuring an enjoyable and fulfilling experience in your BDSM journey. Discover tips on budgeting and where to find quality floggers, all while enhancing your exploration of sensations and power dynamics in consensual play.

Explore the multifaceted world of impact play, emphasizing the importance of consent, communication, and safety. Understand impact zones, choose suitable implements, and learn about the psychological and physical sensations involved. Whether you're new to BDSM or an experienced practitioner, discover how to enhance intimacy and trust through this controlled, consensual practice.

Discover the benefits of diversifying your spanking techniques and routine in consensual adult relationships. Learn how to explore new techniques, tools, and materials to keep the excitement alive. Understand the importance of communication, establishing boundaries, and aftercare for a safe and enjoyable experience. Enhance your intimate connection by keeping your spanking sessions dynamic and engaging.

Explore the exhilarating world of femdom whipping and its role in BDSM culture. Discover how this practice fosters strong emotional connections and trust between partners, transforming fear into a liberating experience. Learn about the playful elements of femdom scenes that encourage creativity and communication while boundaries are explored. Whether you're curious or experienced, understand how dominants and submissives engage in fulfilling encounters that redefine intimacy and pleasure. Join us to delve into the fun and dynamic aspects of whipping in femdom, where trust and adventure meet.

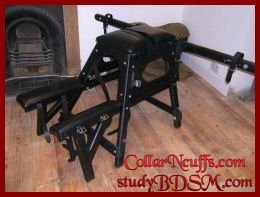
As any quality leather good, a new whip usually needs to be broken in not to only to assess its merits (impact, weight, etc.), but also to gauge the responses it brings forth from the submissive. You first need a whipping post, and a subbie tied up to a post. This assumes you are an experienced whip user. Otherwise, skip the boy for now–just practice on the post!

Explore the thrilling world of BDSM with a focus on flogging in a femdom context. This guide covers the essentials of using a flogger, emphasizing the importance of trust, communication, and technique. Whether you're new to the BDSM scene or an experienced practitioner, learn how to create pleasurable experiences while prioritizing safety and respect. Discover tips for varying your strikes, establishing boundaries, and deepening your connection with your partner. Embrace the journey of exploring new sensations in your BDSM practice.

The term Florentine or Synchronized flogging originally designates the art of wielding two weapons at once, one in each hand. For instance, it can refer to fighting with one sword in each hand, or a sword and a dagger. It is a style developed by the Italians in the city of Florence, hence the name
One of the factors that sets spanking apart from other forms of swatting is the deliberate and sometimes ceremonial positioning of the participants. While some spankings are haphazard, I prefer spankings that include the ritual of positioning. Both the submissive and Mistress adopt positions that facilitate and enhance the spanking. These positions generally work to the advantage of the spanker and the disadvantage of the spankee.